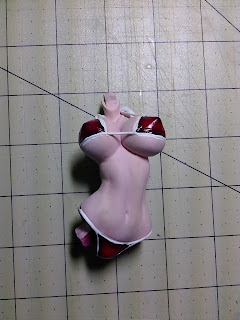
Having done the required preparations needed before painting Mai, I can now move to painting.
I wasn't able to get a lot of pictures for the step by step process since I was working on the kit with very little time and trying to finish as much as I can in the short hours I worked on it.
Primer
For the body, I was trying to incorporate a bit more pink into the skin tone so I decided to use a pink base with red preshade.
After applying the skin tone and adding some post shade, I went straight to coloring Mai's bikini; using a bright red preshaded with black. White details on the bikini were then added. A bit of red bleeding occurred during the masking of the skin, so I had to correct it a bit with the white.
After finishing the body, I worked on the hair. Mai's hair is brown but for base color, I used a dark red called Apple Spice. I then preshaded the hair with black.
For the actual hair color, I used a slightly dark orange called Pueblo. The result is a nice light brown tone. To highlight the hair, I used Pueblo mixed with a bit of white.
With the hair done, the accessories and the base are all that's left to paint. The main accessories on Mai are the ribbons on her bikini and the signature hair ribbon and the knotted sash that's part of her costume.
The beach ball she has is a simple combination of white and blue.
Mai is also wearing a pair of platform flip-flops. These I hand painted black with red detail on the sides and the straps.
Her base is suppose to simulate splashing water, so I started with a white base color, then added blue shading.
With all parts painted, I apply some top coat with her bikini, beach ball, base and her feet getting a lot of gloss.
Now to work on the face. I first filled in the white for the eyes. I also painted the eyebrows the same Pueblo used for the hair. For her mouth, I used pink for the inside of the mouth and pink with a bit of red for the tongue and white for her teeth. Mai's eyelids are molded so coloring those were simply coloring the raised section of the eyes. I then form the iris with some black. Mai's eyes are really big, so as little white left is best. The color of her eyes are colored different from other anime eyes. The color of Mai's iris fill nearly eveything and leaves only a thin black border and a black spot in the middle where the eye's lens is. To finish the eyes, light reflections are added.
Having finished the eyes, assembly can now be done.
First, the legs.
Yes, there is a gap. All the gap removing I did was all just a waste.
Next are the arms. But before the arms are attached, the beach ball needs to be glued to the left hand.
Following the arms are the ribbons on Mai's bikini and back.
With the body complete, The head is then attached to the body and Mai's bangs are glued to her head.
Before the rest of Mai's hair is attached, the ribbon that ties her hair is attached to the hair with a pin. The hair assembly is then attached to the back of the head with another pin. This completes Mai.
For Mai's base, the "water" part needs to be pinned and glued to the wooden base first.
Completing the base, Mai can now be attached to base and displayed. She will require a pin where left foot connects to the base.
1/6 Shiranui Mai Resin Kit Gallery


No comments:
Post a Comment