After painting a few plastic Gundam kits and one resin Gundam kit, I decided to try my hands on painting anime resin figures. My first kit: a 1/8 Nami from One Piece. The kit is a resin version of Megahouse's Excellent Model/Portrait Of Pirates "Sailing Again" Nami.
The kit consists of 19 pieces, a decal of Nami's tattoo. The picture below has Nami's eyes painted cause I tested out painting eyes before actually working on the kit.
With the primer done, I apply the main colors of the kit.
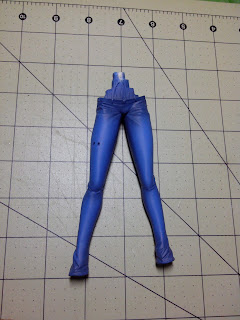
I used a regular blue color for the pants.
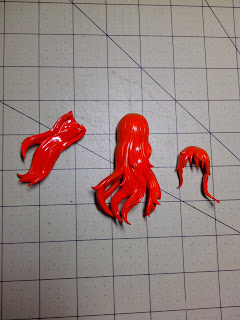
And a bright orange color for the hair.
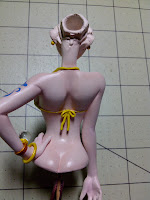
Since this is my first time painting an anime kit, skintone was a matter of a lot of experimentation. After mixing a few batched of colors, I came up with this color for the skin.
After all my basic colors are applied, I added some highlights and shadows.
First on the pants. I pre-shaded some black, applied some of the same blue then highlighted with the same blue mixed with some white.
When it came to the hair, my inexperience with painting anime figures showed. I was originally planning to have the hair end up as a bright orange but an error on my part made me use black as a pre-shade. When I reapplied the orange, the pre-shade made the new coat of orange very dark. Rather than redo the whole hair, I decided to keep it and applied the highlights after. Like the blue, I used the same orange mixed with white.
For the shading of the skin, I first pre-shaded with some pink (learned my lesson on the hair) then after reapplying my skintone, I highlighted with a darker mix of the same skin tone.
For Nami's accessories, which I forgot to take individual pictures of after painting, I used light gold that had lemon yellow for base. I also used yellow on her bikini top. This is a recolor fro the original's blue-green but I kept the original pattern of white stripes and white dots. For her sandals. I used cinnamon to get a wooden look.
I also changed the color of the base from orange to white and painted the raised design on the base; which due to a bit of laziness to do quality work, I sort of messed up.
I then applied a light coat of gloss top coat on the flat pieces and two coats of gloss on the gloss pieces.
When the top coat dries, I then work on painting the eyes. Nami's eyes are rather simple.
I first fill in the eyes with white. For the eyebrows, I used a color pencil. I also added some light pink in the lips to give it some color.
Continuing on with the eyes, I first draw a border of the eyes where the iris would be, which I then fill in with black paint.
I then paint on some orange for the color iris and a small white dot to represent light reflection.
Finally, add a double eyelid and some eyelashes using a 0.1 drawing pen.
I then apply three coats of gloss over the eyes to give them a wet look.
After the eyes dry, I can now assemble her.
First, the two pieces of the hair are put together.
Followed by her accessories. Here I can show the colors I did on the accessories.
The decal of Nami's tattoo is also applied during assembly.
And here's the upper half of Nami completed.
Simply attach to her lower half and we have the completed figure.
Attach the completed figure to the base and Nami is ready to be displayed.
Completed Nami Resin Kit Gallery


No comments:
Post a Comment